Backyard Rabbit Keeping, Part 13/15 – Fur Production
You may have made up your mind against fur production; it could be argued that a fur coat is out of place in a back yard. There is certainly an image of slightly decadent luxury clinging to fur, even now, in some parts of the world. But there is also the frontier man, Davy Crockett sort of warm fur clothing with no pretensions whatever so if the image bothers you, think of Davy Crockett. Most of the published material about curing skins says don’t (but if you must, they add, do this or that). The reason is that curing furs is a skill like many another, presumably once known to mankind in general and now something of a mystery to most of us. Experts have heard so many wails of anguish from enthusiastic amateurs who have expected to get professional results at their first try, and failed, that they are wary of giving advice.
If you approach the subject in an inquiring frame of mind, and learn from your mistakes, there is no reason why you shouldn’t acquire skill in the job yourself. What we did was to send away the most valuable rex skins to be cured professionally after we had air-dried them. We would have been too annoyed if we’d made a mess of them. Any ordinary skins, wild rabbit, or less than prime tame ones we have cured ourselves. You can certainly see the difference! But a hat or a collar on an anorak can be made quite well out of an amateur job; gloves or a coat are better done professionally unless you get very good at it. It depends perhaps on whether you are likely to open fetes in the garment or dig snow in it.
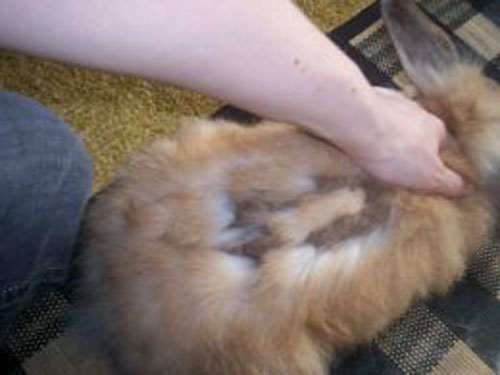
It seems a pity not to use the rabbit skins you produce, even though there might be a sale for them; prices are not very high as a rule and there is a satisfaction in making your own clothes. The main thing to watch is the molt; don’t kill a rabbit while it is molting if you want to use the fur, because it will look raggy and will also go on molting for ever. You will shed hairs over everything. It is easy enough to check the rabbit for molt Run your hand over the coat and examine the skin at the bottom of the hair; if you see patches of new fur growing through, the pelt will be useless.
 |
The best, prime coat comes when the rabbit first reaches maturity at about five months, depending on the time of year. Pelts are best in the winter months; the molt usually occurs in summer. If you intend to use the skin, set to work on it immediately.
Commercial producers often sell raw pelts to furriers to dress – they are able to supply them in large quantities. This is a fickle trade, depending a lot on fashion, but quite a lot of fur is used for children’s toys; and they are grinding it up now to put into animal feeds! Sometimes these pelts are stored in a deep freeze until collection.
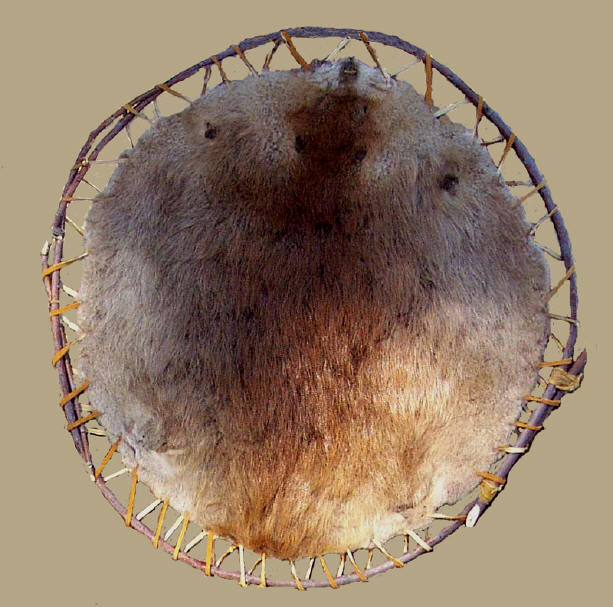
The first stage is ‘air dried’ and this is a better condition in which to have your pelts- they will then keep. When we sent away skins for professional curing we air-dried them first. We nailed them to a board, or you can put them on a wire stretcher. They finish up dry and crackly after this treatment.
The next stage is the cured pelt, which you can achieve at home – but they will not then be saleable to a manufacturer; remember that once you dress a pelt you will have to keep it. The profession insist on dressing their own.
First of all, be sure to skin the rabbit as soon as it is killed. Any slight decay can cause the fur to molt later.
When you have parted the skin from the rabbit, cut off the vent and the head from the fur with sharp scissors and slit the legs and the belly so that the skin lies flat, unless you are using a wire stretcher, which you slide into the skin as it is.
For the flat method, tack the skin out on a board or the side of a wooden box. Use drawing pins or tacks and get it quite smooth, with no wrinkles or tucks. Put a tack at each corner first, as near to the edge as possible. Stretch it slightly but not to more than natural size – although this might be rather bigger than you expect it to be. Things to watch at this stage are any folds, where moisture could remain and decay set in, and any bits of flesh left on the skin, which should be scraped off with a knife before stretching.
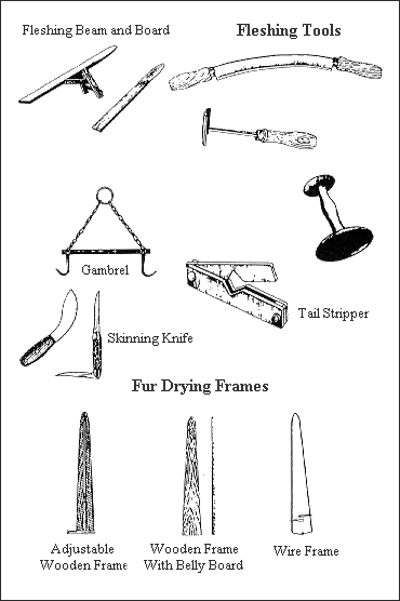
A wire stretcher can be made – imagine a large hairpin from No 9 gauge wire, about 27 ins long. For this, as we saw, the pelt is not opened flat. Pelts are put on the stretcher fur side inwards, and fastened at each end with a clothes peg. At this stage flies must be kept away. Put the stretched skin in a warm, airy place to dry.
 |
The stretcher is quick, but I think the board does a better job. On the board, the tacks should finally be only about one inch apart. The pelt will be nailed fur side down, so that you can see what is happening to the skin side. This is when you can remove any fat or flesh still sticking to the but don’t pull it off; use a blunt knife.
Don’t be tempted to put the pelt out in the sun, leave it to dry naturally in the shed, even if it takes a couple of weeks.
 When this stage is completed you have a pelt which will keep. The urgency is over and the next stage can be left until you have time to attend to it. The choice is now yours; whether to sell the pelts, to get them dressed professionally, or to dress them yourself. If they are valuable, think twice! Meanwhile let us press on with our skins – we can always use them for boot linings, if nothing else. If you store air-dried pelts, don’t fold them or roll them or they may crack. Store them fur to fur or skin to skin.
The next stage is called ‘fleshing’. The large pieces of fat have been removed from the skin before drying, but now every last trace of tissue has to be scraped off the underside of the pelt. This is the tricky part for the amateur, but it must be done before the pelt can be made soft and pliable -and it must be done without cutting the skin.
Old books tell you to scrape the pelt while it is still on the stretching board, but most modern methods start with a wettened skin. The one rule is not to start with a dirty skin.
Take the dried skin off the board or stretcher and soak it in half a bucket of soft water, to which a handful of salt has been added. Let it soak until it is quite soft. This may take two days; some people add detergent as well; to remove the fat. After this, the pelt is wrung out and put on a board, fur side down, and carefully scraped. Professionals move the skin over a fixed sharp knife and peel off the tissue like peeling an orange. If you start with a sharp knife you may well cut the skin; perhaps a blunt one would, be safe. Sometimes a pumice stone is used, starting at one corner and holding the skin down with one hand, to get the peeling effect. The skin is thinner in some places than others, noticeably on the tail.
Take your time with this job. If the skin dries out while you are working on it, soak it again because when it is wet the tissue will peel off more easily.
After this comes dressing. This is done by soaking again, in a different solution this time. There are several recipes, some of them rather complicated.
Recipe for solution: to about 5 liters of water add 60 g salt, 30 g potash alum, 1 g soda ash per liter.
The skins are soaked in this for a day or two and then drained. Some people wring them out, but this may wrinkle them. They can be put in the spin dryer for a short time.
After drying, the skin is made supple. Once again there are several methods. In one, 1/2 oz mild soap is dissolved in boiling water; then hot water and ¼ oz neatsfoot oil are added to make the mixture up to a pint. It is shaken up into an emulsion and when it has cooled a little, the skin is put into it and worked about vigorously. It can be worked and left and worked again – the more the better. Leave it overnight in the emulsion and the next morning, rinse it well under the tap – no wringing. Then it is hung up in a warm place to dry.
The last stage is to clean the fur. This is done on a large scale in a big drum of sawdust which is shaken mechanically. Some people shake their furs for hours by hand, two to four hours at least, laboriously shaking the fur in a container with sawdust to which has been added a substance called Drum-gloss.
To avoid all this work (for after all you have already put in quite a lot of time on your skin), there is an alternative method using fullers earth. The skin is put into a box and shaken up with fullers earth, left for an hour or two and shaken up again. Then it is taken out and the fullers earth is shaken and brushed out of the fur.
So there you have it – a rabbit skin, glossy, supple and ready for use, I hope. Apart from toys and slippers, you need rather a lot of skins before you can make a garment. While you are waiting for them to accumulate, store the dressed pelts in a cool dry place. Roll them if necessary, but don’t fold them. Place fur to fur in a bundle.
If you want to grow your own fur coat, matching skins with some breeds may mean that you need a great many, from which to make a choice; but with white and plain colored skins, fewer will do, although they have to match in length and density as well as color. A full length coat of average-sized skins will need up to 40 and a short coat about 22 skins, but you can make a cape with less than 10, or a waistcoat.
- Why Why Keep Rabbits?
- Rabbits Past and Present
- Some Basic Information
- Making a Start
- Housing
- Feeding
- Growing Crops for Rabbits
- Breeding
- Health
- Harvesting the Wild Rabbits
- The Harvest
- Using Rabbit Meat
- Fur Production
- Showing
- Angoras
   |