Tips on Maintaining & Diagnosing Small Engines
Don’t you hate it when you grab your chainsaw and head for your woodlot, and once you’re there, the saw won’t start? Or you need your generator to produce electricity to run a pump or a saw for a homestead project and you crank and crank and nothing happens? Drives me crazy when I’m raring to go and my machinery isn’t. Do you almost take it personally? I have in the past. I was sure all the engines in the world had gotten together and formed a conspiracy to ruin my day. If you feel that way, maybe I can lend you a hand with a few simple tips that can help you around the homestead.
First and foremost, maintenance is the number one way to keep your engine running. These engines are rugged critters and can have very long lives if cared for properly. Let’s go over general maintenance of 2-cycle and 4-cycle engines.
De-Carbonizing
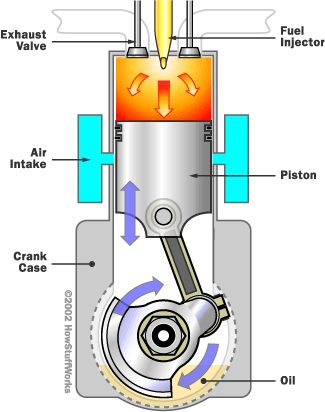 Two-cycle engines get their lubrication from a gas and oil mixture. Therefore, no oil changes are necessary as in a 4-cycle engine. There is only one service procedure done on a 2-cycle that isn’t done on a 4-cycle engine, so we’ll get to that here. It’s called de-carbonizing. Because the engine burns oil with the gas and the 2-cycle system is not as efficient as a 4-cycle, there is a lot of residue left in the exhaust gases which clogs up the exhaust port and muffler. This can really reduce the power a little 2-cycle can produce. De-carbonizing is a very easy procedure for the homestead mechanic to do and save a trip to a technician.
Simply remove the muffler from your engine. You will see a port or hole in the cylinder which will have black, gunky, flaky residue restricting air flow. Rotate the piston to cover this hole so the dirt will not fall into the engine innards. To get the piston to cover the port, you can pull the starting cord very gently, or rotate the flywheel by hand. After the piston covers the port, use something wooden like a dowel or tongue depressor or the like to scrape the gunk off the walls. Do not use a screwdriver tip or metal, as you can easily slip and scratch or gouge the piston. Once the port is clean, check the muffler and clean it, then reinstall.
Changing Oil & Filters
The 4-cycle engine requires oil changes. This will be in your manual. If you don’t have one, a good general rule is to change it more often if it works in a dirty environment, as say a garden tiller versus a generator that’s run in a clean shed. Every 50 hours is a good general engine oil changing schedule, more often if necessary because of dirty conditions. If you don’t have a manual to tell you what type of oil to use, write the manufacturer. They all seem to have differences of opinion as to what to use in their engines. Do not assume if Honda advises a 10W-40W oil that Briggs & Stratton will use the same.
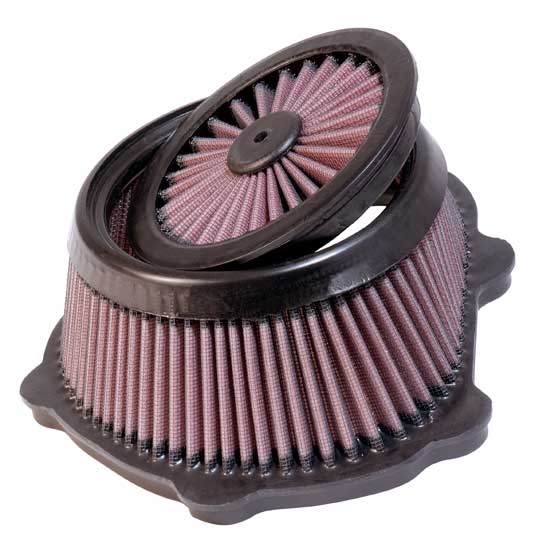 The same rule applies to your air cleaner. Your manual gives general cleaning or changing schedules. If you don’t have a manual, every 50 hours is again a good general rule. There are generally three types of air filters used in small engines: paper, oil impregnated sponge type, and oil bath. They require different methods of cleaning. Paper can be tapped against a hard surface to knock the dust and dirt out, but eventually you will need to replace the element. The oil impregnated sponge is generally cleaned in solvent or soap and water, and then re-oiled before reinstallation and replaced when it loses its body and shape. The oil bath is a simple system also, which only requires you take the air filter apart, drain the oil, clean out the container, refill with oil, and reinstall.
The next filter to keep an eye on is the fuel filter. On most 2-cycle engines, the fuel filter is located on the end of the fuel line in the gas tank. You’ll need to “fish it out” with a coat hanger, or a tool like it. The fuel filter’s job is to keep water and dirt (and sometimes rust particles) from leaving the tank and then potentially clogging the fuel lines or the carburetor. It’s an easy job to remove it from the fuel line and install a new one. This should be done approximately every 100 hours.
Some 4-cycle engines have fuel filters in the same place, but many are in-line, meaning they are located somewhere between the tank and the carburetor. They are easy to replace. Many are just simple bowls that allow the dirt to sink to the bottom and are thus easily cleaned by just draining. Others are actually filters and require replacement. Check your manual for location and type.
As you are changing the filter, check your fuel line for cracking or heavy wear. If it looks weak, replace it. A leaking fuel line may not leak much fuel, but air-cooled engines run very hot, and a little fuel can ignite and burn you badly.
The Spark Plug
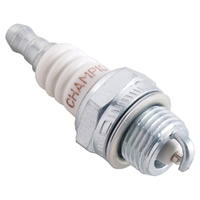 The last simple maintenance item is the spark plug. Most manufacturers recommend replacing it every 100 hours. Here I disagree with them. I have a Honda generator that has run over 1,000 hours on the same spark plug, and it’s still going strong. On 2cycle engines, because of the gas and oil mix, the plug gets dirty faster and needs cleaning more often. To check your spark plug, you’ll need a special spark plug socket with a rubber liner that protects the ceramic body of the plug. Remove the spark plug with the socket and wrench and inspect it.
You can tell a great deal about your engine by “reading” the spark plug. A normal spark plug is brown to grayish tan color and has little electrode wear. The electrodes are the metal L-shaped leg and center metal rod encased in a ceramic cone. The spark which ignites the fuel in the cylinder jumps the gap between these electrodes. For the spark to be strong, these electrodes must be clean. If you find oily residue or black deposits on the plug, it may mean your oil/gas mix is too rich in a 2-cycle engine, or it is not mixed thoroughly enough. In a 4-cycle engine, it means oil is getting into the combustion chamber. This is generally due to bad piston rings or worn valve guides and is a job for a small engine technician. If your plug has carbon deposits or dry soot, again it’s too rich a mixture. Check your air cleaner, and your fuel mix if a 2-cycle. Clean your spark plug with a wire brush or sandpaper or the like.
Before reinstalling, check what’s called the spark plug gap. You’ll need a small tool you can get at any auto parts store. Last week I saw them on sale for 89¢. Get the spark plug gap measurement from your manual and set the L-shaped electrode so it is at the proper height above the center electrode. This is done by gently bending the L-shaped electrode up or down. Then reinstall your plug. Never use any other plug than the one recommended by the manufacturer. Plugs differ in construction, length, temperature ranges, and in other ways. Use the manufacturer’s suggested plug or its equivalent. Severe damage can result if the wrong plug is used. Just because they look the same, doesn’t mean they are.
Diagnosis
All right, you’ve always done your maintenance and you are out in your woodlot and the chainsaw won’t start. Before you throw it around and cuss it out and then head for the repair shop, let’s discuss a few simple diagnostic steps you can do right there, maybe enabling you to cut your wood in a very few minutes. The trick to diagnosing what’s wrong with small engines is fairly easy. Rarely is the problem the engine itself, unless it’s old and been used a lot or abused. Most of the time it is a problem in the “auxiliary” systems of the engine. These systems are air cleaner and air inlet, carburetor and fuel system, and the electrical system.
What the small engine technician does is remember an engine needs three basic things to run. First we need to know if there’s a spark at the spark plug to ignite the fuel. Secondly, we need to know if there’s fuel in the combustion chamber so the spark can ignite the mixture. And finally, is there enough compression in the cylinder so the engine will run. For our purposes that’s all we need to know. Let’s go through these three questions on that chainsaw engine that won’t start out in the woodlot.
Check the Spark
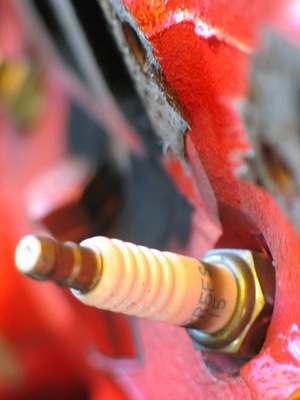 First, let’s check the spark plug. Remove it and look carefully at the electrodes. Are they wet and oily? If so, wipe them dry, and leave the plug out for a few minutes to air out the combustion chamber. You may have just flooded the engine. Replace the plug. Make sure the ignition switch is in the on-position—I can’t tell you how many times I’ve forgotten that dang switch and pulled and pulled and cussed. If it still won’t start, remove the plug again. If it’s oily again, check your fuel/oil mix. You may have put too much oil in the mix or not shaken the mix up well enough. If the plug is just “gasoline wet,” you may have no spark. So next you’ll need to remove the plug from the engine and reattach it to its wire. Put the electrode 1/8″ from a metal surface on the engine and crank the engine over by pulling the starter rope. If you see a spark jump between the plug and the engine, the spark plug is probably fine. I suggest you try to find some heavy shade in the woods to make it easier to see the spark. Also, get the spark plug as far away from the spark plug hole as possible when performing this operation. When you pull the cord, gas is sent into the combustion chamber and will flow out the spark plug hole. If close enough, the spark will ignite this mixture and you could be burned.
So what if you can’t see a spark? Let’s go one more step. Remove the spark plug from its wire and put it aside. Hold the end of the spark plug wire 1/8″ away from a metal part of the engine and pull the cord again. On some wires there is a metal end, on others there is a rubber cap. You will have to hitch up the rubber cap to expose the metal insides, so the spark can make the jump to the metal. Did you see a spark? If so, your plug is bad. Simply replace it. If you saw no spark, then an electrical component is probably bad.
First check the spark plug wire. Follow it as far as you can. You may need to take shrouds or other parts off to follow it. If the wire has a break or is worn through, that’s probably your problem. If really in a pinch, use electrical tape and cover the worn spot in the wire so it no longer grounds out against the metal of the engine. Your saw should now run. Do not use this repair for long. Replace the wire quickly.
If you see no problem with the wire, then it’s most likely an electrical component. If your chainsaw or other tool is relatively new, you, the homestead mechanic, are very lucky, as the newer engines have what’s generally referred to as solid state, or CDI (Capacitor Discharge Ignition) ignition systems. These are simply little (generally) black boxes that make the electricity to fire the spark plug. On older engines, there are points and condensers under the flywheel which are generally too hard for novices to service. But the new solid state ignitions are simple enough for you to replace. These ignition systems are generally not repairable. What you’ll need to do is order the proper ignition box for your engine, then simply replace the defective box. The only thing you’ll need is an air gap gauge or a very good set of feeler gauges. The black box must be set a certain distance from the flywheel, and its magnets have an air gap of .0125 inches. Generally, directions come with the electronic unit.
Check Fuel Delivery
So let’s go back to our non-running chainsaw. We had a spark, but the engine wouldn’t start. So now we’ll see if we have fuel in the combustion chamber. When you checked the plug, was it wet with gasoline or dry as a bone? If it’s wet, we know fuel is in the chamber. If it’s dry after cranking it over five or six times, we know there’s no fuel. Double-check by putting your thumb over the spark plug hole. Crank the engine five or six times. Is your thumb wet? If not, you have no fuel in the chamber.
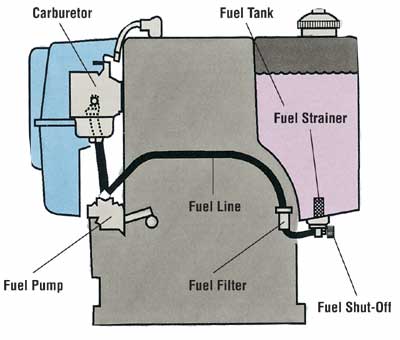 |
Start by checking that fuel filter. Is it clogged? Follow the fuel line to the carburetor. Is it off the engine? Is it clogged? Is it pinched somewhere? Have a kink? If so, clean or replace. If that’s not the problem, it has to be in the carburetor. Do the choke and throttle levers work smoothly? Is the carburetor dripping gas? Many things can go wrong with a carburetor, so it would be best for the novice to take it in for repair. It could be as simple as dirt clogging the jets or something more complicated, like a problem with the float or a bad diaphragm. These are generally work for a technician.Check Compression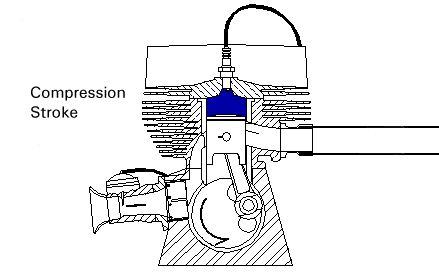 Let’s assume now you have a spark and you have checked and have fuel in the combustion chamber. The only other major system to check is compression. Put your finger over the spark plug hole again and crank over the engine. Does the pressure pull and push your skin and finger? Do you feel the tugging and pushing pressure? If it’s fairly strong, you probably have enough compression to start your engine. If the pull/push seems weak, then use your ears to detect air escaping at the head gasket. Generally a head gasket goes first at the exhaust port side because the temperature inside the combustion chamber is hottest there. Reinstall your spark plug and put your ear as close as you can (safely) near the engine/muffler area and pull the cord. Do you hear whoosh or a hiss sound of air escaping? If so, your head gasket is not sealing the combustion chamber, so the engine won’t fire.If you want to do this repair yourself, it’s fairly easy. Order a new head gasket and replace it. First, remove the top end of the engine with appropriate sockets. Rotate the engine so the piston is at the top of its travel, thus helping to keep dirt out of the combustion chamber. Remove all of the old gasket with a wooden utensil, clean all oil and dirt from the area, replace the gasket, replace the top of the engine.To do a really professional job, use a torque wrench, alternating bolts at the proper foot-pounds of pressure. If you can’t hustle up a torque wrench from a friend, you can do a fair job without it. The most important thing is to do the bolt tightening evenly around the cylinder head. Don’t go in a circle, and don’t tighten down tight on the first pass. This will cause the cylinder head to warp. If there are, for example, eight bolts to tighten, and we number them 1 through 8 in a circle pattern, start with #1 bolt and tighten it just snug, then go to #4, then #2, then #6, then #8, then #3, then #7, then #5. Then, using the same pattern, tighten securely (very securely) and with equal pressure to each bolt. Keep an eye on them when first using the tool again. If they loosen, tighten them down even more snugly. It really is best to use a torque wrench, but most people don’t have one.Lastly, did your chainsaw start and run for 5 to 10 seconds, then sputter and die? Check the fuel cap. Atmospheric pressure pushes gas from tank to the carburetor, so there’s a very tiny hole in your gas cap. Use a pin and clean out any dirt or gunk sealing up the hole. Try starting your saw again.If you live in the boonies and there’s no small engine shop nearby, but you have an auto parts store, like NAPA or others, many of them carry the most-used filters and gaskets, or they can order them for you.Remember those three simple diagnostic tests: compression, ignition or spark, and fuel in the chamber. If your chainsaw ran yesterday but won’t start today, the most likely cause is the replacement fuel mix which gunked up your spark plug. Look for these simple things first, for your 2- and 4-cycle engines before you take them to the repair shop. Then you’ll know whether you can fix it easily yourself or whether you truly need a small engine technician.Additional Research:
   |
Leave a Reply